How to install bathroom mirror cabinet
Installation method of aluminum bathroom mirror cabinet
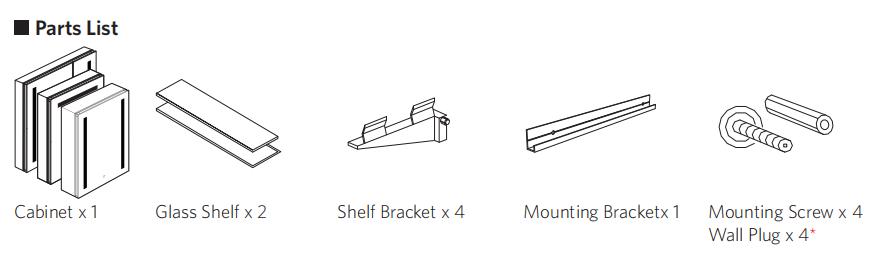
First,Open the package and confirm that the mirror cabinet product components are complete
- Mirror cabinet
- Glass shelf
- Shelf Bracket
- Mounting Bracketx
- Mounting Screw
- Wall Plug
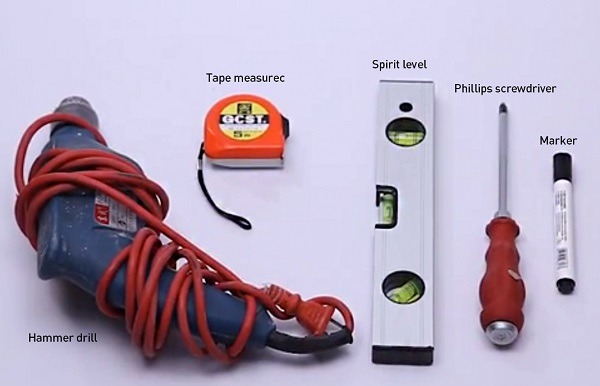
The second,Prepare installation tools Mirror cabinet Installation tools have Hammer drill, tape measure, Spirit level, Phillips screwdriver,marker
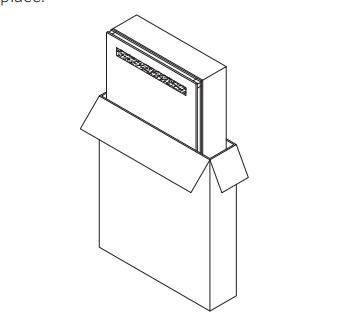
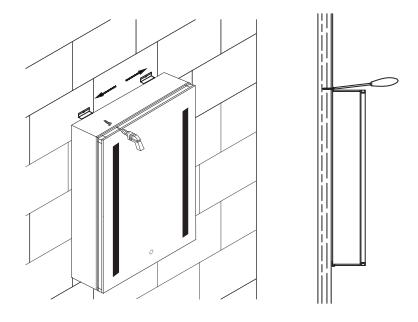
Third,Slowly pull out the medicine cabinet and lay it flat on a level place.
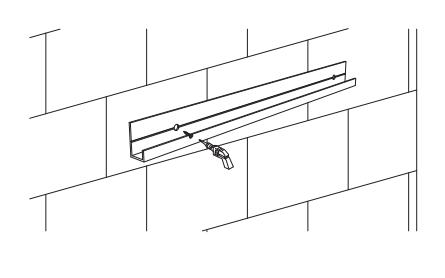
Fourth,With using a spirit level, choose a proper position of your mounting bracket and mark 2 drill holes on it

Fifth,Fix the mounting bracket on the wall with screwing down the provided screws.
Sixth,Place the bathroom medecine cabinet onto the mounting bracket and make sure it is fully clasp on the plate.
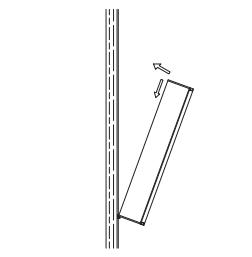
Seventh,Using a spirit level to recheck if the cabinet is aligned.Adjust the 2 hanging brackets until finding a proper place to mark down. Take out the mirrored cabinet and lay it flat again. Then drill holes on the marks and insert the wall plugs.
oincided with the drilling holes. Then fix the bathroom mirror cabinet with screwing on the provided screws and make sure the back of the led mirrored cabinet is fully clung against the wall.
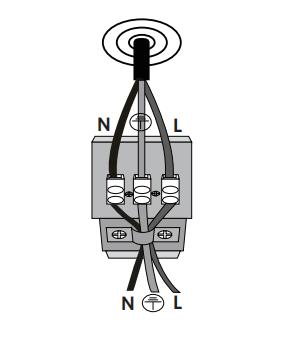
Eighth,To reduce the risk of electrical shock, shut off power before wiring the cabinet. Make connections. L- Live wire in brown, G – Ground wire in yellow & green, N – Neutral wire in blue.
A loose wire connection might causes multiple problems as overheating, operating failure and other damage. Please ensure all connections are tight enough.
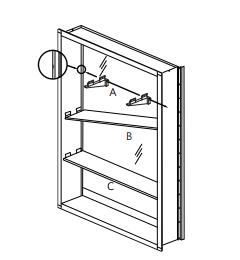
Ninth,Insert 4 shelf bracket,2 Adjustable Tempered Glass Shelves, Clipping the shelf brackets into any height of the setting holes you want and make sure it is at the same level as the opposite one.
Clip a shelf bracket into a side groove at first. Then sliding place one side of the shelf on the first bracket while clip in another bracket. Finally place another side of the shelf on the second bracket.
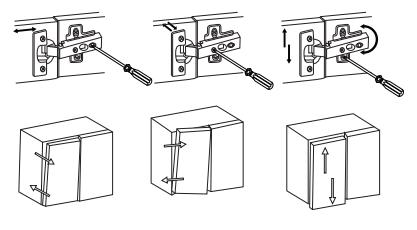
Tenth,Adjust the hinges to make a perfectly level and aligned door. Pull off the hinge cap and use a screw driver to adjust the door in different direction, such as forward/ backward, left/right or up/down.
Tips before Installation
1. Please keep 15 cm distance between the mirror cabinet and the wash basin;
2 mirror cabinet installation wall must be load-bearing wall.